Below are some important resources that are helpful for starting out with building and programming

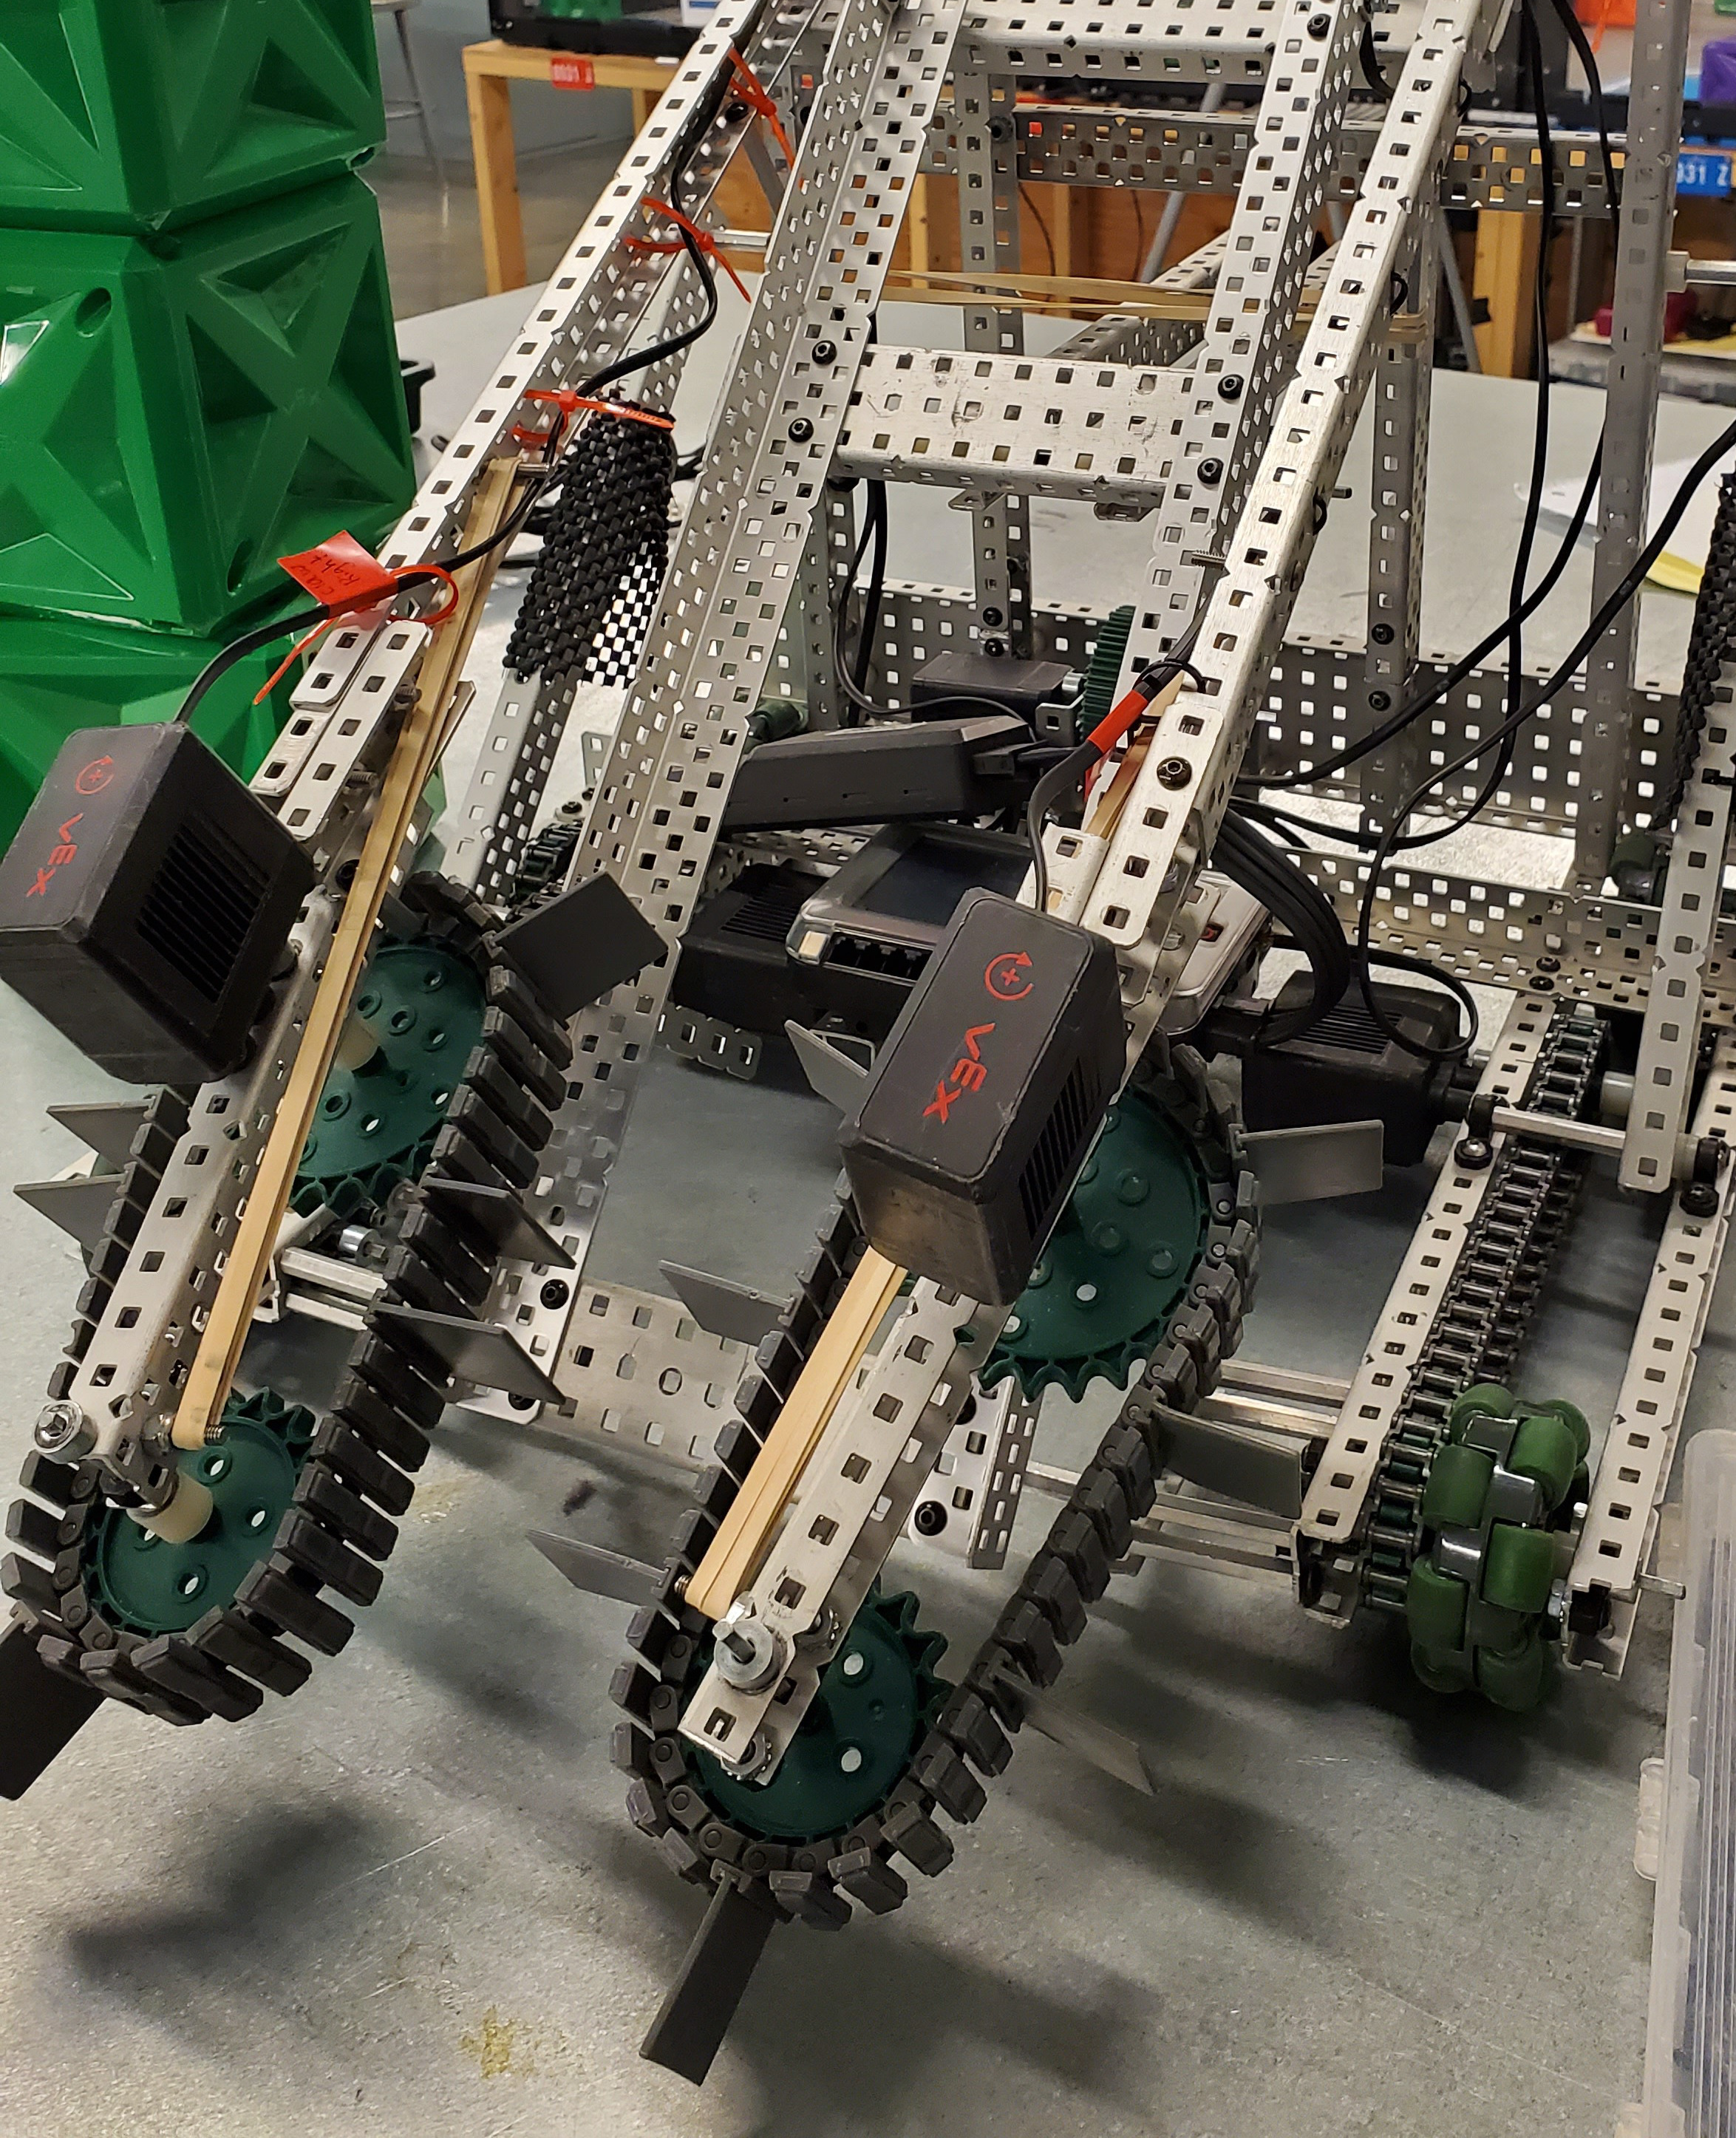
A chassis is the essential part of the robot, and the first thing built on the robot. It is important to build this well, since this is the foundation for the whole robot, and a pain to replace in the future. As for the motors used to drive the robot, it is recommended to use 2 motors as the drive motors, unless additonal power is needed. We also recommend to use high speed motors, unless the robot is needed to climb up something or push very heavy objects. If that is needed, then use the regular motors, or switch to 4 drive motors. If that still doesn't provide enough torque to complete the task, then either gear up the drivetrain to have a higher torque or switch to high torque motors (this makes your robot slow and can be a major disadvantage, so this should be the last resort)

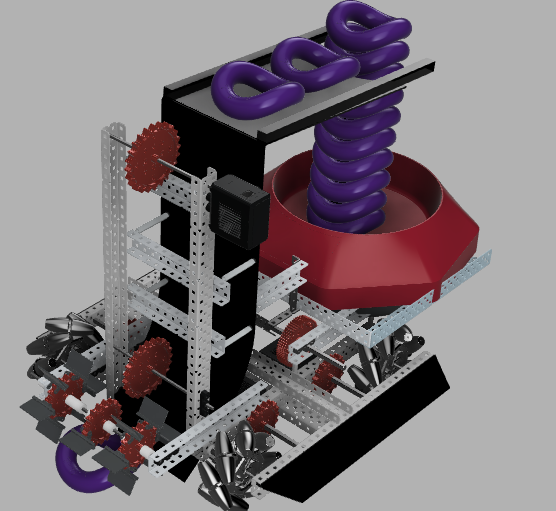
This is a very commonly used design used in ny robots that need to be able to lift components. When paired with a high-torque motor or torque increasing gear-ratios, these lifts can be very strong, and allows the robots to reach high up objects. The only downside to having a lift like this is that it can make the robot unstable, and this design is likely to tip the whole robot very easily (so a counterweight will be neccessary)
The type of intake system that is needed will depend on the different components used in the competition, but the basic idea is often the same: use some kind of hook, flaps, or wheels to grab objects and move them to somewhere else on the robot. It often helps to have these to be flexible, since most objects that get picked up are not symmetrical and it makes it easier to grab things.


A claw can be used whenever something needs picked up to be moved somewhere else. To get a claw to close using one motor, make sure to have an even number of gears, so the sides of the claw will move in opposite directions.
For a clamp you will want to connect this to a motor and push down on the object (the best angle for this is usually perpendicular to the contact point) This can also be done with pneumatics.


Because of the size requirements, many teams use different flip-out mechanisms to allow for more components within the 18 inches (Just make sure that the fully extended width doesn't exceed 36in). These flipouts often have some use of motors or rubber band tenison to allow the component to move to position. For rubber bands, you will want the component to connect to some other part of the robot that will be able to trigger the bands to pull to the correct position. Motors can be used to let components nest inside the robot, plus this gives them more functionality.
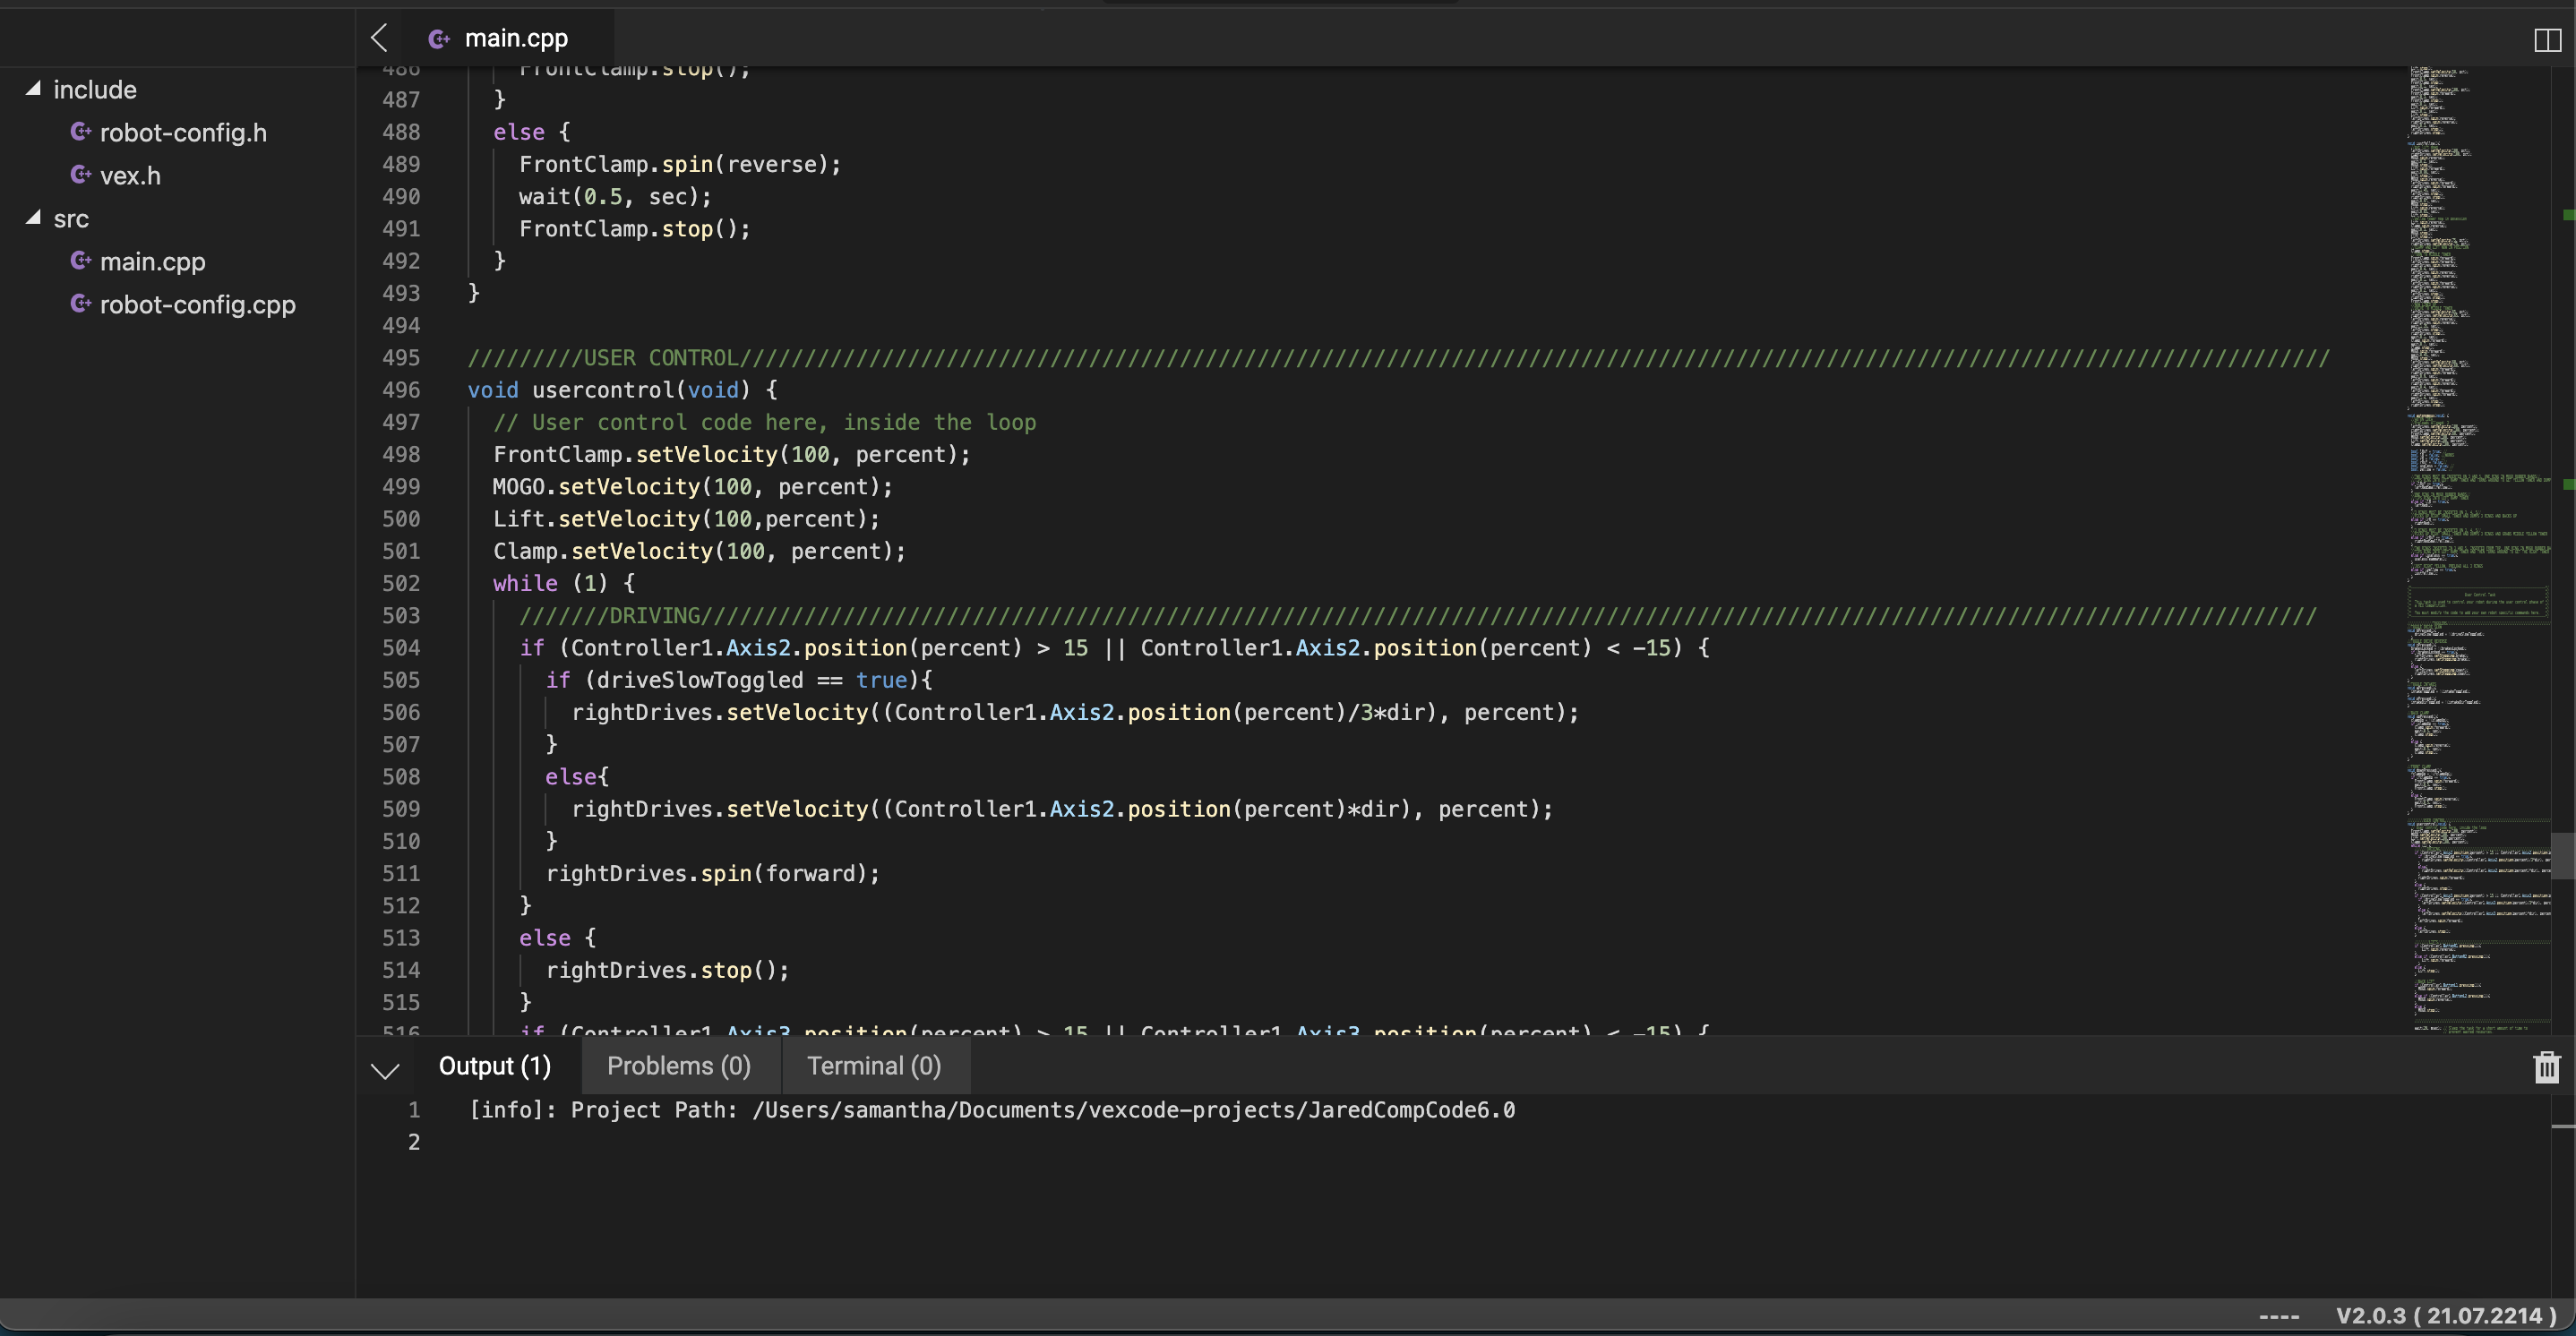
We use the VEX Code V5 editors to program the robots. Most teams use the text versions, but the blocks version is also availiable (please dont use this, it is very inefficient and some of the old programmers in the discord will not help anyone who uses blocks, purely because it disgusts them) Both editors are availiable for all computers (including the chromebooks) and if the V5 Pro version is availible on your device, use that version.
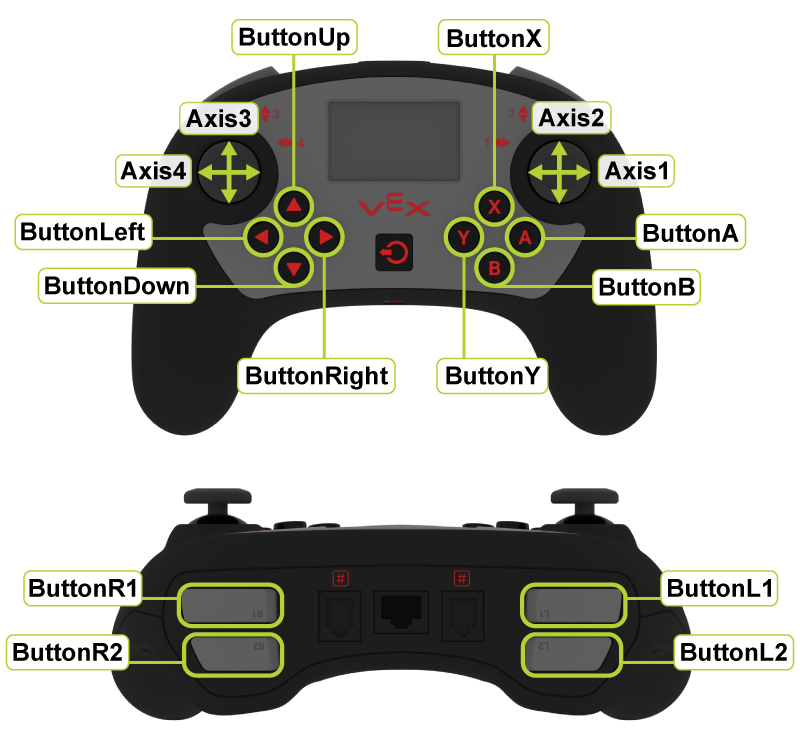
There are many different ways to configure the driving controls, and this is mostly up to the driver to decide which ones they prefer, but we most commonly code the left joystick to drive the left chassis motor(s) and the right joystick to control the right chassis motor(s). This configuration takes a bit to get used to, but it works best for driving. The other way that some groups use is tank controls, where one joystick controls forward/backward motion, and the other controls turning. We don't use that one too often because it is difficult to code and isn't as good for competition driving. Additionally, if using the joysticks for driving, you will want to allow a tolerance (we usually do about 15) so that the joysticks will only trigger once you push them beyond a certain point. We do this so that if the joysticks get messed up and begin to drift, this won't cause any issues. Other buttons can be configured to move other motors and complete different tasks.

This reference website has everything needed for every function, class, and variables used in Vex V5. It may be a bit difficult to read at first, but learning how to read API references will be very beneficial for anyone who wants to do programming in their future. All of the uppercase names are classes, and all lowercase names with parenthesis are methods (methodName()) You will most often be using the methods. The descriptions will tell you everything you need to know about that specific function/class.


PHSN Robotics Member 2018-2022